More pages: 1 2 3
4 5 6 7 8 ...
11 ...
12
Framework 4 (Last updated: October 25, 2019)Framework 3 (Last updated: February 6, 2017)Framework 2 (Last updated: October 8, 2006)Framework (Last updated: October 8, 2006)Libraries (Last updated: September 16, 2004)Really old framework (Last updated: September 16, 2004)
Custom resolve
Thursday, March 27, 2008 | Permalink
One of the more interesting features of D3D10 is access to individual samples in a multisampled texture. This has a lot of uses and one of the most obvious is to implement a custom resolve of the multisampled buffer. This allows an application to combine the samples in the buffer in any way it likes in a shader. One reason an application may want to do that is because of HDR rendering. Any decent tonemap operator will have a non-linear response, which makes regular resolves that average samples produce low quality antialiasing. In fact, even with just relatively modest contrast ratios the effect of antialiasing will diminish or even disappear. The solution to this problem is to make a custom resolve shader that tonemaps all samples individually and average the results after tonemapping, rather than before, which will be the case with a regular resolve.
For a more in-depth explanation of this technique check out my article "Post-tonemapping resolve for high quality HDR antialiasing in D3D10" in
ShaderX6.
This demo should run on Radeon HD 2000 series and above and GeForce 8000 series and above.
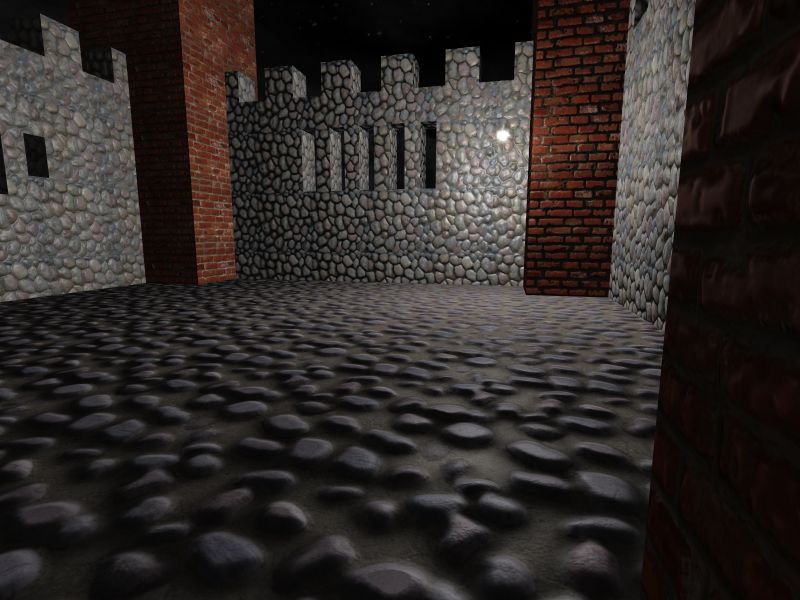
Order Independent Translucency
Tuesday, December 11, 2007 | Permalink
This demo implements order independent translucency using a Stencil Routed A-Buffer, which is explained in this
exemplarily short paper. The basic idea is that you hijack MSAA for the purpose of storing multiple incoming fragments in each pixel. Each stencil sample is initially cleared to a separate value and then the geometry is rasterized with multisampling disabled. The stencil test will then route the incoming fragments one by one to each of the available samples, as long as there are unwritten samples available. This allows up to 8 layers to be stored with current hardware. Once the buffer has been filled it is sorted in back-to-front order and blended. The paper suggests using bitonic sort; however, this demo uses odd-even mergesort instead because that requires fewer compare-and-swap operations to be performed (19 instead of 24).
This demo uses D3D10, but it could have benefited from D3D10.1 in at least two ways. First of all, multisampled depth buffers can't be used for texturing in D3D10, so this demo uses a separate render target for this purpose. Also, now the depth bits of the depth-stencil buffer is entirely unused, which is wasteful. Secondly, and probably more important, is that multisampled buffers can't be CopyResource'd in D3D10. Currently a significant chunk of the frame time is consumed just initializing the stencil buffer. A better way to handle this would be to initially set up a stencil clear-buffer just once, and then clear the active stencil buffer by copying that stencil clear-buffer into it. A copy is likely a good deal faster than 8 fullscreen passes with a sample write mask, which is required now.
The advantage of using this technique compared to depth peeling is that you don't need multiple passes. If you want up to 8 layers, you need 8 passes with depth peeling, whereas this technique only needs a single pass, plus a sort pass. The disadvantage is that once the buffer is full fragments will be discarded. If you limit yourself to 8 layers with depth peeling, you'll get the 8 front-most layers, whereas with this technique the layers are destroyed based on the order they arrived, meaning that the front-most layer could be the one that got discarded if you're unlucky, which of course is a lot more disturbing than dropping layers in the back, which may not be noticable at all.
This demo should run on Radeon HD 2000 series and up and GeForce 8000 series and up.
Deep deferred shading
Monday, November 26, 2007 | Permalink
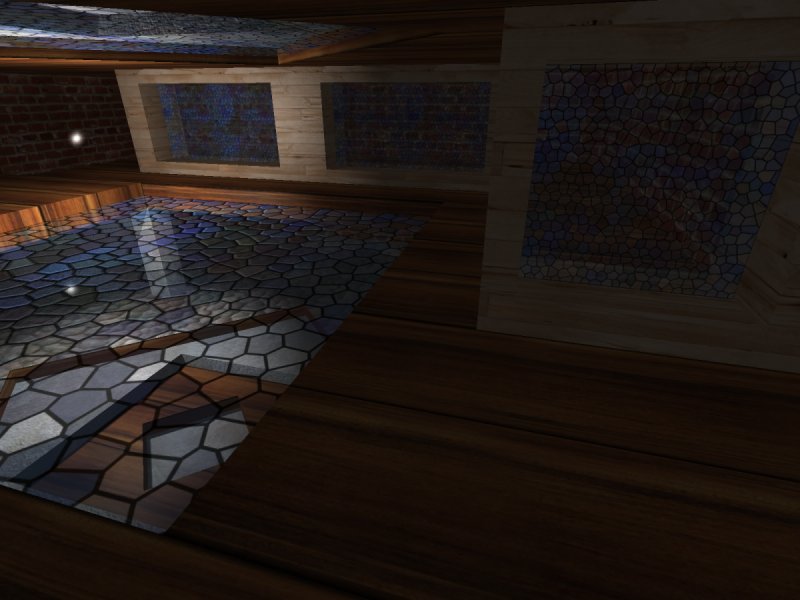
One of the main drawbacks of deferred shading is that it doesn't handle blended objects very well, and typical rendering scenes include at least some translucent objects. The usual solution to this problem is to render translucent objects using traditional forward rendering on top of the deferred rendered scene. This is obviously far from ideal since it forces you to write and maintain a forward rendering path in addition to the deferred shading path, and it also has negative performance implications.
This demo shows a way to solve this problem such that translucent objects can be used with deferred rendering. This is done by using a deep buffer approach. Instead of having a single buffer containing the attributes such as diffuse and normal this technique stores several layers of these attributes in a texture array. Similarly, the depth buffer is also a texture array. In this demo three layers are used, which allows for up to two translucent layers in front of an opaque surface. More layers may be needed in more complex scenes; however, it would still typically suffice to maintain only a few layers. The different layers are extracted using depth peeling.
In the deferred lighting passes the lighting contribution from each layer is computed. However, the cost will not multiply with the number of layers, but instead be only somewhat more expensive than traditional deferred shading since we can stop once we hit an opaque surface, and typical scenes will have a lot more opaque surfaces than translucent, so the majority of the pixels will only have to evaluate the first layer.
The drawback of this technique is naturally in the memory consumption. Deferred shading already consumes a large amount of memory for the render targets, and this technique multiplies that with that number of layers. This may not be much of an issue on PC, but on consoles it could be more problematic. The cost of the light rendering passes also increases, although not too bad. However, the cost of filling the buffers in the beginning increases by a larger number.
This demo should run on Radeon HD 2000 series and up and the GeForce 8000 series. Since it's Direct3D10, Vista is also required.
Deferred shading
Tuesday, October 23, 2007 | Permalink
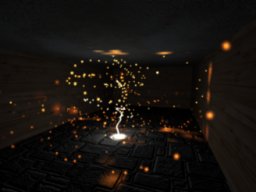
A technique gaining increasing attention these days is deferred shading. The main idea behind deferred shading is that you initially fill a set of buffers with common data, such as diffuse texture, normals and various material properties. Then for the lighting you just render the light extents and fetch data from these buffers for the lighting computation. The main advantage of this technique is that it decouples lighting from the geometry. In regular forward rendering you have to resubmit all the geometry that's within the light radius to add another light. This might include changing a lot of states and shaders and issuing numerous draw calls. With deferred shading only a single call is neccesary, in fact, you can apply several lights with a single draw call. This makes it scale much better than forward rendering when the number of lights increases. On the downside, it typically consumes more memory, bandwidth and shader instructions than forward rendering.
This demo takes deferred shading to the extreme. A particle system in generated entirely on the GPU and spews loads of particles in all directions, and every particle is a light source. Hence in this demo there are 1024 light sources active at once. Yet, the performance is in the order of hundreds of frames per second.
The geometry shader is used in this demo to compute the light bounding boxes and each visible light is drawn as a rectangle in clip-space. Note that the extents in z direction is computed as well. This allows the pixel shader to skip computations where the stored depth value is not in range. This eliminates a lot of unlit pixels.
This demo should run on Radeon HD 2000 series and GeForce 8000 series on Vista.
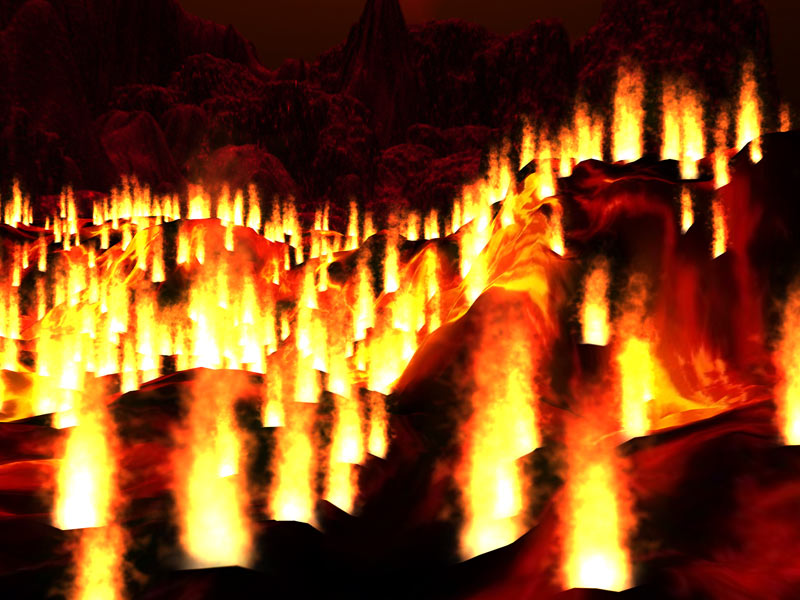
Inferno
Sunday, August 5, 2007 | Permalink


 Executable
Source code
Inferno.zip (1.0 MB)
Required:Direct3D 10This demo uses a couple of interesting features of Direct3D10. It doesn't use any vertex or index buffers at all (except for what the framework uses for GUI), instead everything is generated in the shader from the SV_VertexID and SV_InstanceID system generated values. The skybox has only tree vertices (fullscreen triangle), so by generating that in the shader we avoid the API overhead of binding buffers (which is not the bottleneck of a skybox pass of course, but that's besides the point). The terrain renders instanced triangle strips which read from height from a heightmap. The heightmap is in BC4 format, or ATI1N as it was called in D3D9. This gives us a very compact geometric representation for the terrain. There are 1024 particle systems, all rendered in a single draw call by using instancing. The particle systems are stateless and are generated entirely in the vertex shader from the input vertex and instance IDs. The geometry shader is used to expand the incoming points from the vertex shader into quads in screen-space. This is similar to how point sprites used to work, except it's more flexible and this demo uses rotation on the particles, something that point sprite can't do.
This demo should run on Radeon HD 2000 series and GeForce 8000 series. Since this demo uses D3D10 it only works in Windows Vista.
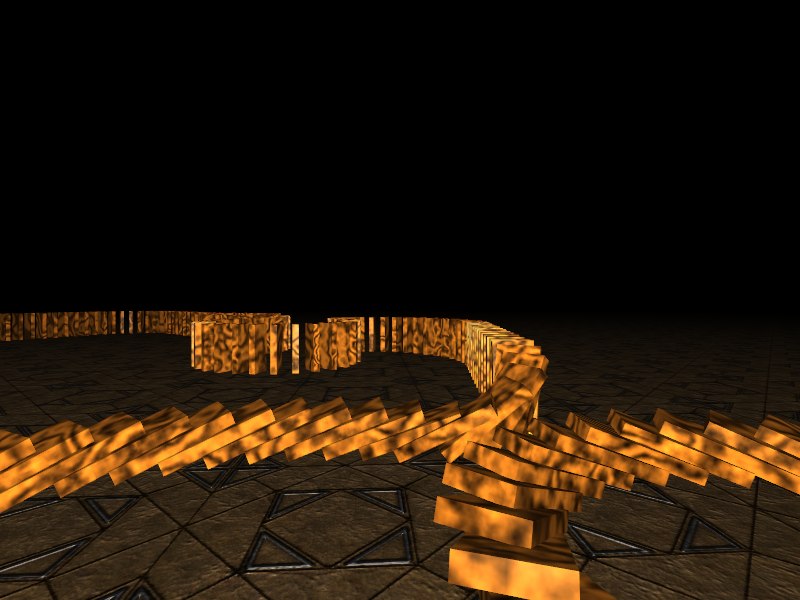
Domino
Sunday, February 4, 2007 | Permalink


Executable
Source code
Domino.zip (194 KB)
Required:GLSLThis demo is mostly for eye-candy, but contains a couple of interesting techniques too. OpenGL currently has no particular API for doing instancing. There exist some pseudo-instancing techniques for OpenGL, such as using a vertex attribute and issuing a new draw call. This of course does not cut down the number of draw calls, but should have relatively low cost per call, making drawing lots of objects managable compared to for instance setting shader constants. Another method, which this demo uses, is based on shader constants. It uses multiple copies of the model in the vertex buffer, each with a particular index. The index is used to grab the instance data from a constant array. This allows you to draw as many instances in a draw call as you can fit instance data in the vertex shader constant storage. While this doesn't cut the number of draw calls down to a single one it at least divides the number of draw calls by a fair amount, in this demo 64 (set conservatively, could probably be increased).
The other interesting technique used here is the wood shader, which is loosely based on the wood shader that comes with RenderMonkey. The RenderMonkey wood shader suffers from a serious aliasing problem at a distance since the wood rings are mathematically generated. To solve this problem I'm deriving the rings from the noise texture too, which of course is mipmapped and thus doesn't suffer directly. I added a repeat factor on the returned noise, which adds back some aliasing, which I get rid of by adding a mipmap bias for the lookup.
This demo should run on Radeon 9500 and up and GeForce FX 5200 and up.
Ambient aperture lighting
Sunday, December 3, 2006 | Permalink
This demo implements a variation of
Ambient Aperture Lighting. I went with a simpler implementation than what's in the paper, but the concept is the same. The idea behind ambient aperture lighting is that you approximate the directions from where light can reach the surface with a disc. So you store a direction vector to the centre of the disc and the size of the disc. In the more elaborate version in the paper they compute the intersection area between the light disc and the aperture disc. In my implementation I simply take the dot product between the light vector and the aperture direction, and the difference between that aperture size as the shadow factor.
Ambient aperture lighting is a quite rough approximation, but one of the cases where it applies is terrains, which naturally also translates to bumpmaps. In this demo I use ambient aperture lighting to compute a cheap self-shadowing factor.
The advantage of this method compared to horizon mapping, which can be used for the same purpose, is that it's cheaper. Horizon mapping require a 3D texture, plus either complex math or a cube lookup table for the angles. Ambient aperture lighting requires a 2D texture only. Horizon mapping is also more aliasing prone and there's also a problem with texture coordinate discontinuity when accessing the horizon map, meaning that you either can't mipmap it (more aliasing) or you'll have to use a lookup with gradients (only supported in SM3.0 hardware) to avoid artifacts. Additionally, a benefit of ambient aperture lighting is that the size of the aperture is pretty much an ambient occlusion factor and can thus be used for a better looking ambient lighting (see the outside of the castle in this demo for example). However, in horizon mapping's defence, it is a better approximation of the occluding geometry so you can find cases where it will look more natural than ambient aperture lighting.
This demo should run on Radoen 9500 and up and GeForce FX 5200 and up.
Volumetric Fogging 2
Sunday, October 8, 2006 | Permalink
Executable
Source code
VolumetricFogging2.zip (858 KB)
Required:GL_ARB_shader_objects
GL_ARB_vertex_shader
GL_ARB_fragment_shader
GL_ARB_shading_language_100This demo shows a method for generating volumetric fog where the fog itself has texture, which adds a lot to the realism compared to traditional uniform fog and allows the fog to be animated. The downside is that it's a lot more computationally expensive. It's implemented by raytracing from the surface back to the camera through the fog and iteratively mixing in the fog at each sampled position. This way you can also include shadows in the computation which gives you nice light shafts through the fog. In this demo I have just stored the shadows in a static volume lightmap for fast lookup and good quality.
This demo should run on Radeon 9500 and up and GeForce FX 5200 and up.
More pages: 1 2 3
4 5 6 7 8 ...
11 ...
12