More pages: 1 2 3 4
5 6 7 8 9 ...
11 ...
12
Framework 4 (Last updated: October 25, 2019)Framework 3 (Last updated: February 6, 2017)Framework 2 (Last updated: October 8, 2006)Framework (Last updated: October 8, 2006)Libraries (Last updated: September 16, 2004)Really old framework (Last updated: September 16, 2004)
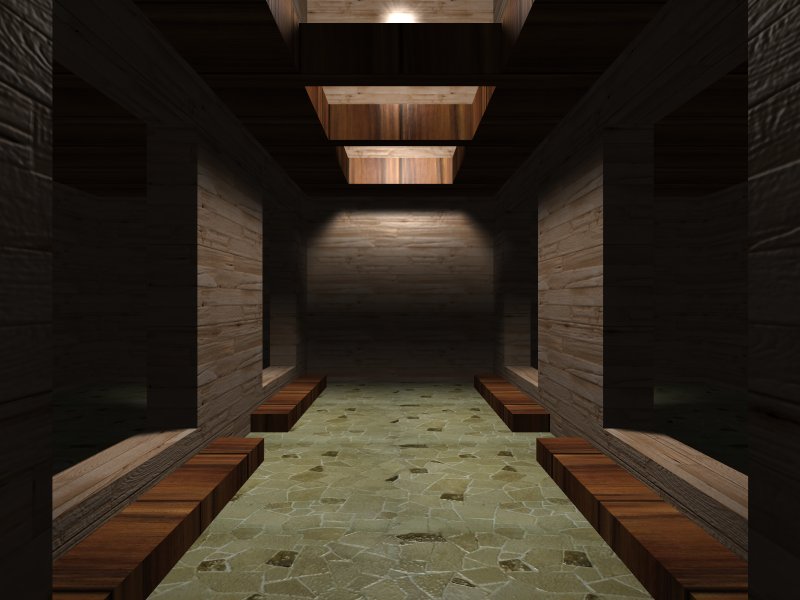
Dynamic lightmapping
Sunday, August 20, 2006 | Permalink
Generating lightmaps can be a quite time-consuming task, thus they are typically generated offline and shipped with the application. That's also what I've done in the past with the demos that use lightmaps. Even though my lightmap generation code probably could be optimized a fair bit, I doubt any CPU implementation could get anywhere close to the performance you can get by offloading this task to the GPU, which is what this demo does.
First a position map is generated on the CPU. The position map contains the worldspace position that each pixel in the lightmap maps to on the geometry it's used with. The position is preprocessed a bit to push it out slightly from the geometry to avoid precision problems. It's particularly important since I generate four position maps to antialias the shadow slightly, and the offset sample positions cannot cut into the geometry or you'd get artifacts.
The shadows are generated with a standard cubic shadow mapping technique, except it's done in texture space of the lightmap with the position looked up from the position map. The process of generating the shadow map is quite fast and definitely real-time if you're doing plain hard shadows. The texture filter will then smooth the edges a bit to get somewhat soft shadows. This is slower than just doing shadowmapping directly though and the quality improvement is relatively small. It does give you the option to blur the shadow in lightmap space, which is cheaper than doing it per pixel with regular shadow mapping. However, in order to really differenciate from plain shadow mapping this demo implements real soft shadows with the light sampled at 512 positions. The shadow for each light position sample is also 4x antialiased. The antialiasing was added since it adds some extra quality especially with a small light radius and adds very little to the cost (generating the shadow map is the bottleneck). Generating this soft shadow is almost real-time, but not fast enough to do every frame. However, once it's been generated it can be reused forever and give you soft shadows nearly for free.
Typical applications of this technique could be to either generate lightmaps fast on end-user machines to reduce download size, or for semi-dynamic lights in games, where the light position is expected to remain static most of the time, such as lighting up a candle.
This demo should run on Radeon 9500 and up and GeForce FX 5200 and up.
On the first run it will generate four position maps, so it may take up to maybe 10 seconds to load. Later runs will start much quicker.
High Quality Texture Compression
Friday, June 2, 2006 | Permalink
This demo shows a way to achieve higher quality texture compression than DXT1 at a bit higher bitrate by using 3Dc+. Don't complain about the lack of artwork or eyecandy in this demo (it's just a single textured quad) since that's not the point, but the point is to illustrate the quality difference between this method and DXT1.
In JPEG compression the first step is to convert RGB to YCbCr, a color space based on luminance (Y) and chrominance (Cb and Cr). The rationale for this is that the eye is much more sensitive to luminance information than chrominance, and by converting it to this color space we can sample luminance at full rate and chrominance at a lower rate. Typically JPEG files sample luminance at 1x1 and chrominance at 2x2, which already cuts down the data to half the size at nearly no visible quality degradation.
The method I use here is similar to this first compression step in JPEG, but I take it one step further by storing the Y channel in an ATI1N texture and CbCr in a lower resolution ATI2N texture. This essentially gives you a 6bpp texture format, with a lot better quality than DXT1. Now it's true that DXT1, which is 4bpp, looks good with most textures, but there are exceptions. DXT1 doesn't perform very well with photographical images, some textures with smooth gradients, some very detailed textures, non-uniformly colored textures, textures with diagonal features or features that otherwise lines up badly with the 4x4 pattern. In these cases this method looks much better. Additionally, it's in many cases possible to sample CbCr at 4x4 without significantly reducing quality, resulting in 4.5 bpp. This will almost always look better than DXT1, but could see more color bleeding than 6bpp.
Decoding YCbCr into RGB in the shader is very cheap and takes only three instructions. Generally speaking this method has quality close to RGB8 but performance close to DXT1. The default view is a bit zoomed in so you can judge quality, where performance difference is small since it's all magnified, but if you zoom out so you get most of the texture visible covering the screen you'll see bigger performance difference.
In addition to using ATI1N and ATI2N I've also added similar compression using DXT1 and DXT5. This gives the same performance as the 3Dc modes, but visibly worse quality. It's still better than DXT1 though.
Use the keys 1-6 to toggle between DXT1, YCbCr DXT/3Dc & 4.5bpp/6bpp and RGB.
This demo should run on Radeon 9500 and up and GeForce FX and up.
Dynamic branching 3
Tuesday, April 25, 2006 | Permalink


 Executable
Source code
DynamicBranching3.zip (1.1 MB)
Required:GL_ARB_shader_objects
GL_ARB_vertex_shader
GL_ARB_fragment_shader
GL_ARB_shading_language_100
GL_EXT_framebuffer_object
This demo illustrates the benefit of dynamic branching in a per pixel lighting scenario. On the F1 dialog you can toggle dynamic branching, as well as shadows and single/multi pass. Branching is used at several places in the shader. It skips past instructions if the pixel is outside the light range, is backfacing the light, or is in shadow.
This demo should run on Radeon 9500 and on and GeForce FX and up. Only those cards supporting dynamic branching will see a performance benefit by enabling this path, that is X1300 and up and possibly also the GeForce 6 series.
Hair
Monday, April 3, 2006 | Permalink

Executable
Source code
Hair.zip (925 KB)
Required:R2VB
Pixel shader 2.0This demo illustrates a hair simulation using R2VB. The hair consist of a large number of strands. Each strand is a line in a render target, and each node in the strand is represented by a pixel in the render target. The simulation is similar to a typical cloth simulation, except springs only connect in one direction, along the strands. The first node of every strand (the leftmost column of pixels) are locked to the moving balloon head. The rest of the hair will follow it wherever the head is bouncing. Collision is computed against the head and the floor.
Currently the demo draws the hair as lines. This has the effect that the hair will look thinner in bigger resolutions or when the head is close up. An easy fix for that would have been to scale the line width as appropriate. Unfortunately, D3D doesn't expose any way to draw wide lines. With additional work a shader could have expanded the lines into a triangle strip with adjustable width, but I was too lazy to do that.
This demo should run on Radeon 9500 and up.
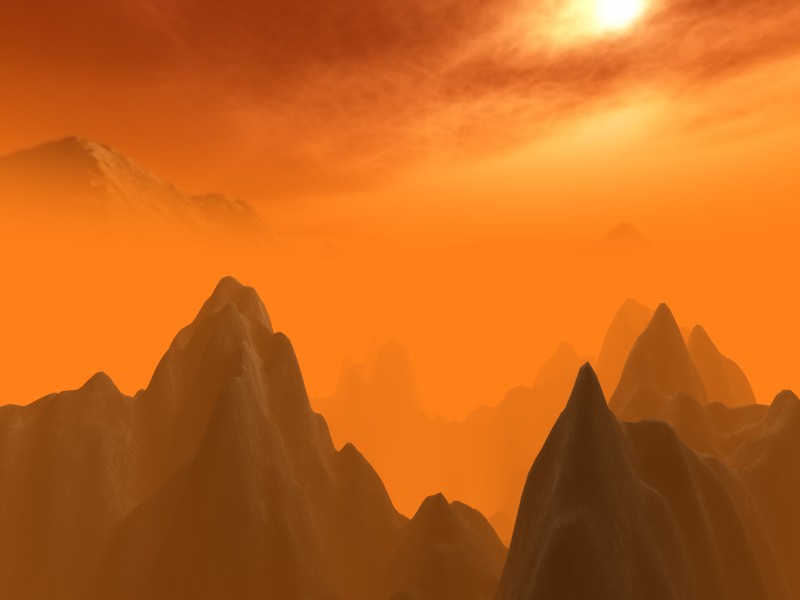
Infinite Terrain II
Thursday, March 9, 2006 | Permalink
Executable
Source code
InfiniteTerrainII.zip (939 KB)
Required:R2VB or VTF
Pixel shader 2.0Recommended:R2VBA bit over three years ago I made the
Infinite Terrain demo, which generated new terrain on the CPU as it needed it and uploaded to a vertex buffer. With R2VB there's now a possibility to generate terrain on the GPU, and that's what this demo does. First a pixel shader generates a noise function representing the height into a texture. This texture is then sampled in a second pass to generate the normals. The normal and height is written to a RGBA16F render target which is later used as a vertex buffer. If half floats are not supported in the vertex declaration RGBA32F is used instead, and if R2VB is not supported VTF is used instead.
This demo should run on Radeon 9500 and up and GeForce 6 series and up.
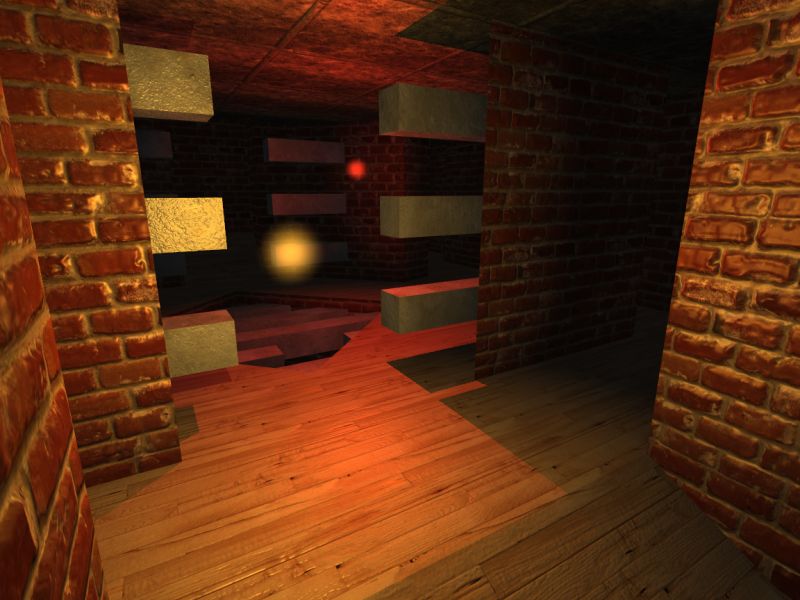
Selective supersampling
Monday, February 6, 2006 | Permalink
In the debate of MSAA vs SSAA most people have now accepted multisampling as the victor, at least in relation to the performance impact. Still, there are a few that love supersampling for its higher quality and its ability to reduce aliasing not just on the edges but also internally in the surfaces, whether they occur due to a badly applied texture filter or high frequency components in shader output. Some have argued that in the era of shaders and the aliasing that some of them bring supersampling will make a comeback. I'll give them half a point for that; however, the future still belongs to multisampling when it comes to driver/hardware side antialiasing. Global supersampling is just too expensive to be an option in most cases. That doesn't mean supersampling will never be applied, in fact, I believe it will be used more frequently in the future, but it will be implemented on the application side, and probably directly in the shader. This is what this demo shows.
The advantages of supersampling in the shader is that it gives the developer fine-grained control over where to apply it, to what degree and what sample positions to use, rather than just providing a global switch. In this demo there's one a bit aliasing prone bumpmap on the floor. The aliasing is showing up with the specular lighting, which is a fairly common scenario. So the app supersamples this particular material and nothing more. The walls are not supersampled, neither is the skybox and certainly not the GUI. Furthermore, the shader only supersamples the specular lighting. The diffuse lighting does not have a problem with aliasing for this bumpmap, so it's not supersampled, nor is the lightmap, base material and so on. Additionally dynamic branching can be used to shave off even more of the work.
This fine-grained selection of course means the performance loss is signficantly less than regular supersampling. A driver side 4 sample implementation would normally be in the range of 1/4 the original speed or even less, plus that it uses a good deal more memory for the framebuffer. This application side supersampling doesn't use any extra memory and is able to keep up with 77% of the original speed on my system.
How does it work? It's implemented using gradients. Remember that the gradient returns the difference between neighboring fragments in a fragment quad. The texture coordinate plus the gradient in x would land on the texture coordinate for the neighboring pixel to the right of it if it's one of the left column pixels in the quad. The math doesn't match perfectly in the other direction of course, but the disparency is normally not a concern. Multiplying the gradient with sample positions in the [-0.5, 0.5] range gives you texture coordinates for the samples, which you can then input to any function to compute whatever you want to supersample.
For the dynamic branching I compute the gradient of the center sample's specular. If there's a big change in the specular value between the pipes the supersampling will kick in, otherwise it will do with just the center sample.
This demo should run on Radeon X1300 and up and GeForce 6 series and up.
Use the 1-6 keys to select the amount of supersampling. The view wobbles a bit by default to show the aliasing a bit more clearly. To disable this, press 0. To toggle the use of dynamic branching, use the 9 key.
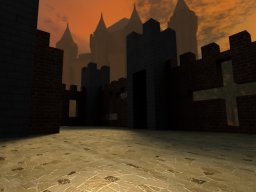
GameEngine2
Monday, December 12, 2005 | Permalink
Executable
Source code
GameEngine2.zip (5.8 MB)
GameEngine2.7z (5.0 MB)
Required:GL_ARB_shader_objects
GL_ARB_vertex_shader
GL_ARB_fragment_shader
GL_ARB_shading_language_100
GL_EXT_framebuffer_object
GL_EXT_multi_draw_arraysRecommended:GL_ARB_texture_compressionThis demo shows a fairly simple way to handle large game worlds. The main problem with large game worlds, as opposed to the regular tech demos I normally do, is that you have way too much data to throw it all on the GPU. Drawing everything is not an option.
There are loads of different techniques out there to handle this, portals, BSPs, PVS etc. In this demo I chose to go with an exemplary simple technique, namely to split the scene into axis aligned cubes. Then in a preprocessing step I compute for each cube, what other cubes it can see. Only points in open space are considered. The preprocessing step is quite expensive. It took about an hour and a half to preprocess the scene in this demo. On the other hand, it's extremely simple to evaluate on runtime and makes checking visibility for dynamic objects easy. Just check what cube(s) it's in and check whether that cube is visible from the cube of the camera. It's a conservative check which could include some hidden objects of course, but that's true for most techniques. I don't know if this technique generally performs better or worse than other techniques, but it works well enough, and it has the most important attribute, it's scalable. It's not the size of the scene that matters, but the amount of simultaneously visible lights and surfaces. The cubes also allows you to cut down on the amount of drawn surfaces for a certain light. Only the cubes that are within light radius (or light frustum for spotlights) and are visible from both the light and the camera need to be drawn.
Each cube also stores the maximum visible distance. This way the Z can be as tightly packed as possible by using only as distant far plane as needed. The advantage of this is that it improves Z precision, but perhaps more importantly, improves efficiency of HyperZ. Speaking of HyperZ, by drawing the cubes in smaller to larger distance order, we get a very good front-to-back draw order in the initial Z-pass, which gives a healthy performance increase.
There are more optimizations possible using only these cube-to-cube visibility check, and not everything is implemented. You may find a few TODOs in the source, which I didn't bother finish up for this release. Maybe I'll add it later on.
The disadvantage of this technique would be that using conventional draw calls you either have to produce an index array dynamically or split things into a lot of draw calls even for the same light/material combination. Fortunately, OpenGL has a glMultiDrawElementsEXT call that can render a range of subsets of the index buffer in a single call. This way the number of draw calls normally stick to 80-150.
This demo should run on Radeon 9500 and up, and GeForce FX 5200 and up. You need to have OpenAL installed to run this demo. You can get it
here
Note: The first time you run this demo there will be about 10s delay (depending on your CPU speed) as it precomputes some data (I didn't want to bloat the download). For all runs after that it will use cached results and start much quicker.
HDR
Monday, September 5, 2005 | Permalink
Executable
Source code
HDR.zip (2.9 MB)
HDR.7z (2.4 MB)
Required:GL_EXT_framebuffer_object
GL_ARB_shader_objects
GL_ARB_vertex_shader
GL_ARB_fragment_shader
GL_ARB_shading_language_100This is an HDR (high dynamic range) rendering demo, complete with the mandatory butter-on-my-glasses blur effect.

The main scene is first rendered to an RGBA16F texture. For the blur effect it's downsampled and converted to a fixed point format. This texture is then blurred in several steps, with each step sampling at twice the size as the previous step. The HDR assets, which is actually only the skybox, an RGBE format is used. The RGB components are stored as DXT1 and E as L16. This cuts down the storage space (and download size!) and memory bandwidth requirement to less than 1/3 of the cost of RGBA16F with no perceivable loss of quality. This also allows for filtering all the way back to R300.
This demo should run on Radeon 9500 and up and GeForce 6800 and up.
More pages: 1 2 3 4
5 6 7 8 9 ...
11 ...
12